Friday, November 18, 2011

Checking in...

So...whats new since the last post?

It was Halloween...that was fun, and very cute, too.   The girls went trick-or-treating for the first time, mostly riding around in the wagon and chasing around their cousin, Captain America. 


We have been talking a lot about Autumn, trees and leaves these days.  Our favorite books have been One Red Apple, by Harriet Ziefert, Autumn, by Gerda Muller, and A Tree is Nice, by Janice May Udry.  We have also enjoyed stomping and kicking the leaves in our yard.


When daylight saving time ended, there was lots of waking up at 6 a.m. and a couple of evenings falling asleep while mama was making dinner!


This week, we have had a lovely playdate with a sweet friend from our local babywearing group, we visited the botanical gardens with nana, stomped in puddles in the rain, built forts, danced, and baked bread and cookies (yay!)  We also went to the market, did laundry and dishes all that stuff, too.


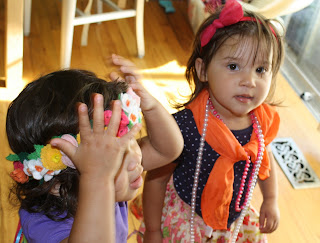
The girls have also been enjoying the newest addition to our dress up box!  This adorable crown is based on one I found on the Hippos and Dinosaurs blog.  It's a super fast and easy project, and so cute!  It took less than an hour to complete, and would be a great holiday gift for any little person.


That's it for now, see you soon!


Monday, October 3, 2011

Bubbles!

Bubbles are fun for cleaning things....


For standing in...


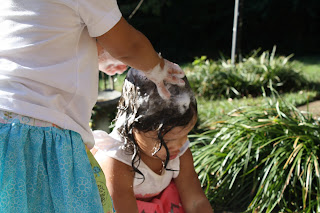
and for washing hair...


 with a little help from Isla.


30 minutes of clean fun!

Wednesday, September 28, 2011

Tutorial: Adding fringe to a woven wrap (or any woven fabric!)

Okay, so I wasn't 100% lazy over the summer.  Here's a little tutorial on a project I did, adding fringe to a wrap.   This could be used on any piece of woven fabric, and would be a great way to add a little something to a simple shawl or table runner. 

First, If your fabric has a hem, cut off the hemmed edge.   My wrap had tapered ends, so I cut it straight across.   The straighter your cut, the easier it will be to remove the weft threads. (As the photo below indicates, I'm not very good at cutting straight and learned this firsthand.)


With a seam ripper, undo the side seams a few inches (the length you want your fringe to be).

Use a seam ripper or pin to loosen the first weft thread (the one going across the width of the fabric), then grab the thread and gently pull out. 


Continue, pulling the threads out one at a time.  Yes, this takes a long time, but you'll end up with a big snag if you try to pull more than one thread at a time. Once you get the fringe to the length you would like, you can put a stitch in the side hems to keep them from unraveling further.


Gather a small piece of fringe and knot, continuing in evenly spaced increments along the length of the fabric.  I held my fabric down with a pin, so I could use both hands to gather and knot and the wrap would stay in place. 


After finishing the first row of knots, I separated each strand, placed two adjacent strands together and knotted again.  You could also twist these around each other once and knot if you have enough length.


Trim any uneven fringe.  The fringe might be a bit crinkly from being woven, but it will straighten out with a wash or just a swish in hot water.  You might need to untangle with a comb after washing.

One of the things that helped me get even knots was to wait until I had all the knots done in each row before I tightened them completely.  I was able to move the knots up or down slightly when tightening as needed.

Here it is finished!


 And here it is in action, with a crumb-faced baby.


Friday, September 9, 2011

Hello Again!

 So, I've been gone all summer long (hey we've been busy!), but inspired by three days straight of rain and sweater weather, and some gentle prodding from family, I have returned.  We have really been enjoying the cool days, making vegetable soup and bread.  Knowing the weather around here, we'll get a bit more hot weather before fall really starts, which we will also enjoy...maybe even more now that we've had this little taste of Autumn.
sweater weather!


bread!


In addition to our regular routine of reading, songs, cooking and whatnot, we have really enjoyed the summer hanging out at home and traveling to visit with family.  We went the beach and had a fantastic time with our grandparents.  The girls love the water, building sandcastles, and watching kites.


At home, we've been doing a lot more art.  Mostly tempera paint, and crayons, also some chalk on our big easel chalkboard.  A little play-dough with rolling pins and cookie cutters, too.


 I started a lot of crafts that are still in progress.  Some doll clothes, crowns, dresses for the girls, and these applique beanbags.  Goodness.  I'd better get to work.  I have been trying to take advantage of this nice weather and do some sewing outside, especially in the morning while its cool and the girls are playing.


 We have been playing a lot of dress up.  We are loving flouncy skirts and "snowman hats".


Mostly we have been hanging out outside in the garden, helping mama to water the plants, lazing about on blankets, having tea parties, playing with water, sand, leaves, sticks and other
outside stuff, hanging in the wrap swings and having a good time.


We have had a relaxed and easy summer, as the season should be, and are excited for the fall (at least I am).  Looking forward to pumpkins, apples and the return to rhythm and routine that the season seems to bring.  Hopefully that will also include updating this blog. 

See you soon (promise!)

Friday, June 24, 2011

Felt Flower Garland Tutorial

I have been looking for some neat items to make for the dress up box, because my children have really been into playing with it lately.  They are really interested in putting on clothes and hats, and always love to hide under the playsilks.  Though I have found some really adorable crowns and garlands on Etsy and elsewhere, I didn't see exactly what I had in mind, so I came up with these cute flower crowns that would be great for any little or not-so-little girl.  They don't require advanced sewing skills to make (I am no expert seamstress), but it does take some time to cut out all the little pieces.  So...here's my first tutorial, the Felt Flower Hair Garland. You could make yours as interesting, wild, abstract, or simple as you want. 

You'll need:
Felt, in flowery and leafy colors, plus an exra piece of green for the headband
1/2 inch elastic, about 6-10 inches
small piece of fabric 2 x 10-14 inches

First, cut out and sew together various felt flowers and leaves.  I just experimented to find a few shapes I liked. 


Next, cut out two pieces of green felt, about 16 inches in length and 1 1/2 to 2 inches wide for the headband.  My daughters are toddlers, so if yo have an older daughter, you might want to measure how long you would like your flowers to be and lengthen as necessary.  I also had to sew two pieces of felt together to get the necessary length.


Sew the flowers and leaves onto one of the green strips.  I placed the flowers along one of the strips the way I wanted them to be on the finished piece and used that as my "pattern" while I sewed them to the other strip.


Here are my finished flower strips.  I'm making one for each of my girls, so I have two pictured.


After sewing on the flowers, pin the other strip of green felt along the back of the strip of flowers.


Sew into place along the long edges with a blanket stitch, leaving the ends open to insert the elastic.


To make the casing for the elastic, cut a 10x2 inch strip of fabric.  You could use any lightweight fabric, I dyed an extra piece of silk I had on hand.  Fold this in half lengthwise, wrong side out and sew along the long edge. 

Turn right side out to make a tube.  Insert a 6 inch piece of elasticin the tube and sew ends closed, scrunching up the fabric and making sure the elasic is encased in the end, making a stretchy worm.  Again, you might need to adjust the casing and elastic length for size.


Insert the ends of the elastic into the open ends of the headband and blanket stitch to secure.


To finish it off, add some pretty cascading ribbons.


Lovely!

Sunday, June 19, 2011

Bread

We have been on a real bread making kick here lately.  Until recently, the only bread I’ve been able to make is Irish soda bread.   I’ll admit, I was afraid of yeast breads.  Lately, I have decided to conquer my fear of the yeast and we have been makin’ bread like crazy around here!   it’s a great activity with toddlers, they love to touch the flour and dough and really enjoy getting messy (Toddler aprons are another project I’m trying to get around to, more on that another day). 


I’m still trying to find a light whole wheat bread, but everything I’ve tried has been pretty heavy.   However, I found this white bread recipe and adjusted it a little, and it has turned out wonderfully every time.   This week, we had slow cooker pork barbecue sandwiches with homemade buns.   Delicious!  Here’s the recipe…

2 (.25 ounce) packages active dry yeast
3 tablespoons white sugar
2 1/2 cups warm water (110 degrees F)
3 tablespoons margerine, softened  (the original recipe called for lard, and you could also use butter, I suppose.)
1 tablespoon salt
6 1/2 cups bread flour

1.  In a large bowl, dissolve yeast and sugar in warm water. Stir in lard, salt and two cups of the flour. Stir in the remaining flour, 1/2 cup at a time, beating well after each addition. When the dough has pulled together, turn it out onto a lightly floured surface and knead until smooth and elastic, about 8 minutes.
2.  Lightly oil a large bowl, place the dough in the bowl and turn to coat with oil. Cover with a damp cloth and let rise in a warm place until doubled in volume, about 1 hour.
3.  Deflate the dough and turn it out onto a lightly floured surface. Divide the dough into equal pieces and form into buns.  Cover the buns with a damp cloth and let rise until doubled in volume, about 40 minutes.  (You could place in bread pans at this point, let rise, and voila! White bread!)
4. Preheat oven to 425 degrees.
4. Bake at 375 degrees F for about 20 minutes or until the tops are light golden brown.

Enjoy!

Tuesday, June 14, 2011

Summer!

A perfect summer day.  Market in the morning and an afternoon spent outside.  We also got a special treat today.  While we were outside this morning, we got to see all our baby birds leave the nest!